User-Defined Content (Custom Views)
Custom Views allow you to:-
Look at columns from different experiments/schemes in the same table
Look at specified alleles from schemes
Add your own columns and data to strains
Creating a Custom View
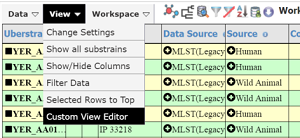
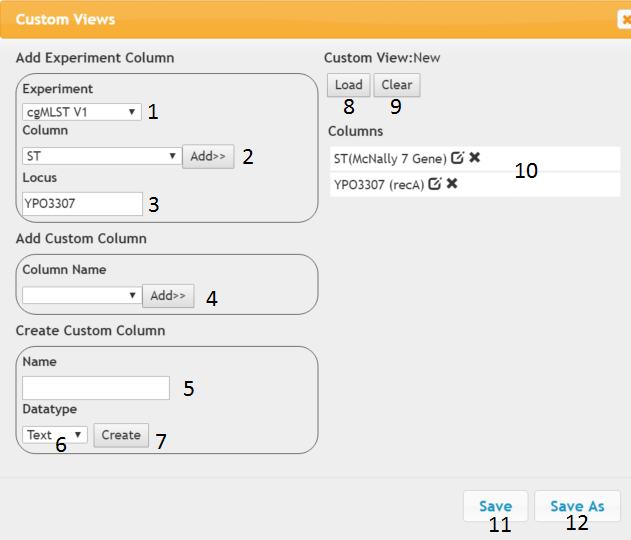
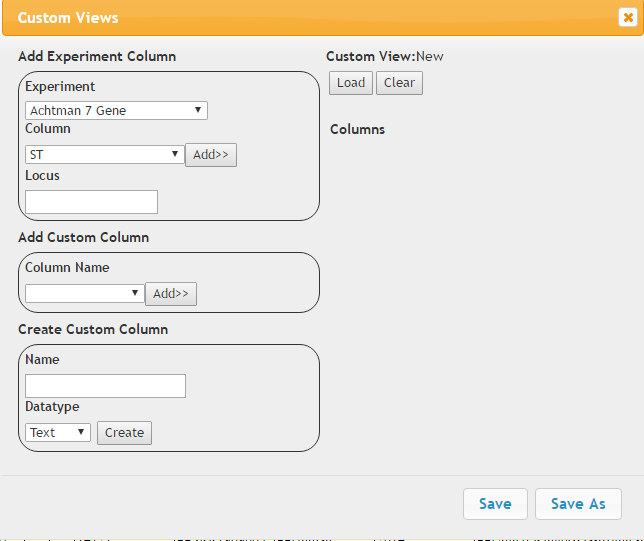
A custom view can be created from by opening the custom view editor, which can be accessed through the main ‘View’ menu on the database search page(see above). This opens the dialog box shown below. Initially the Custom View label on the upper right will show New and no columns will be present on the right hand side.
Adding Experimental Columns
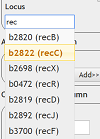
From the Experiment drop down (1) choose the Experiment/Schemes whose column you want to add, then you can select the column in the drop down below (2) and press Add. The name of the column should appear in the right hand panel (10). The default name of the column is the name of the scheme/experiment(column name) although you can edit this by clicking on the pencil icon next to the label. If the Experiment is a scheme then the Locus text box will become enabled. When you start typing the name of the locus tag or gene name, a drop down should appear with suggestions, clicking on one of these will add the locus to the list of columns on the right.
User Defined Fields (UDFs)
Create User Defined Fields
A User Defined Field can be created by giving a name (text box 5) and selecting a datatype (6) and then pressing the Create button (7). The name of the column will then appear in the custom columns dropdown (4) and can be added to the view
Add User Defined Fields to a Custom View
Any UDFs you have previously specified or are publicly accessible will appear in the ‘Add Custom Column’ box in the ‘Column Name’ dropdown (4) and can be added to the view with the ‘Add’ button.
Manipulating Columns
The order of columns can be changed by dragging the column labels on the right of the dialog. Names for scheme columns can be edited by clicking on the pencil icon and columns can be removed with the cross icon
Saving The View
Once the view is complete, you can save it by pressing the Save As button (12). This will open a dialog and you can choose the view name and where to save it you will be informed if the view has been saved correctly and it should now appear in the dialog box (opened with the custom view icon on the right of the screen
Editing a Custom View
A custom view can be edited by loading it into the editor with the load button (8) (this will clear any data in the editor). The view can then be edited e.g columns added/removed, re-labelled or the order changed as explained above. The view can then be updated by the ‘Save’ button (11) or can be copied using the ‘Save As’button (12) in which case you will be prompted for a new name and location
Working With Custom Views
Loading a View
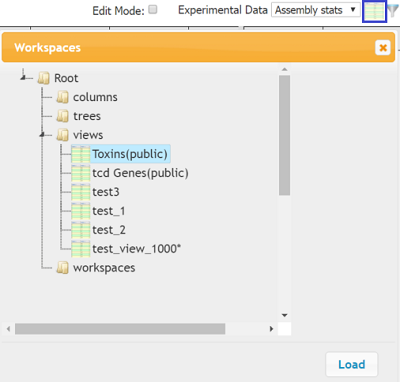
Custom Views can be loaded by the custom view icon on the top right of the page (highlighted by the blue box in the image above). The view will appear in the right hand table in exactly the same way as any other Experimental Data and can be worked with in the same way
Searching
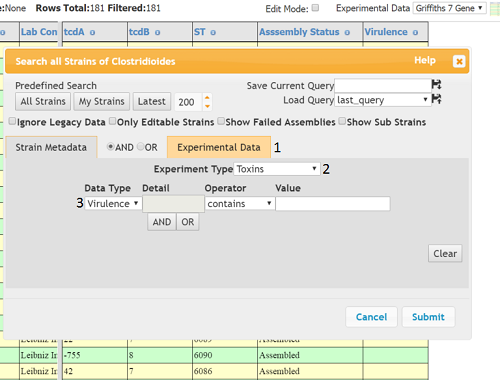
Searches on any user added columns for a custom view can be performed in the normal way in the Experiment Tab (1) of the main Query Dialog by selecting the name of the view from the ‘Experiment Type’ dropdown (2). Any user defined (custom) columns can then be searched by selecting them in the ‘Data Type’ dropdown.
Adding Data
Data can be added to custom columns in the view by simply clicking on the cell (make sure you are in edit mode). To edit a column you either need to be the owner of the column or have access to the column by another user sharing it with you. Data can also be uploaded using a tab delimited text file e.g.
All the file requires is a column with the strain barcodes and any custom columns. Any other columns can be present (e.g. strain name) but will be ignored. To get a template you can either download the entire table that you are working with (Data > Save to Local File) or download just the custom view (Right click the view > Download Data or Experiment > Download Data). The file can then be manipulated in a spread sheet and uploaded (Right Click > Upload Data or Experiment > Download Data)
Any changes in the view either due to uploading a file or by directly typing in a cell will be shown in yellow. To make the changes permanent you need to upload them to the database (Right Click > Save Changes or Experiment > Save Changes)
Sharing Views and Columns
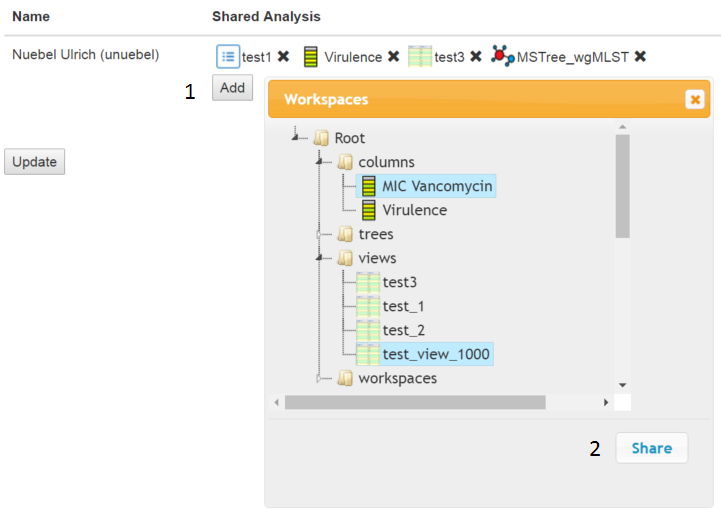
Columns and Views can be shared with other users in the same way as any other analysis types, see [here](buddies). On the buddies page, just click the ‘Add’ (1) button for the user you want to share with and in the dialog select the views/columns you want to share, then press the ‘Share’ button (2)